Complete guide to automatic bicycle pedals – Everything you need to get started!

Automatic pedals are often a source of apprehension for beginner cyclists. Rest assured, we've all been there! We've put together a complete guide for you, to be discovered on video, with a short summary of the key points in the article. We'll look at why auto pedals are useful, how to choose and adjust them, and a few tips for getting started.
Video guide to car pedals
What is an automatic pedal?
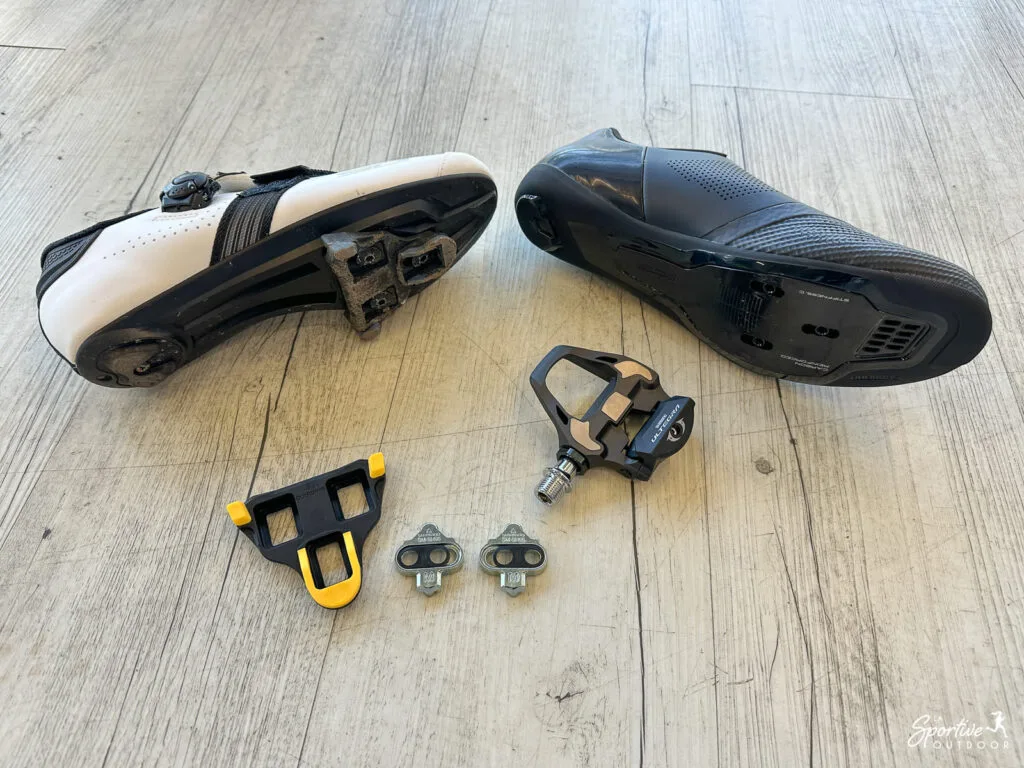
An automatic pedal is a system that allows you to attach your foot to the pedal via a cleat screwed to the bottom of your shoe. The set comprises three components:
- Pedals, fixed to the bike
- The wedges, which enable the
- Shoes, which must be adapted to the wedges

Good to know
When you buy the pedals, the cleats come with them: no need to buy them separately then 🙂
Why use automatic pedals?
The advantages of automatic pedals are numerous:
- Better efficiency: by pulling and pushing on the pedal, you optimize pedaling.
- Better foot position: avoids pain and imbalance.
- More control: especially in mountain biking and gravel, where you can really become one with your bike.
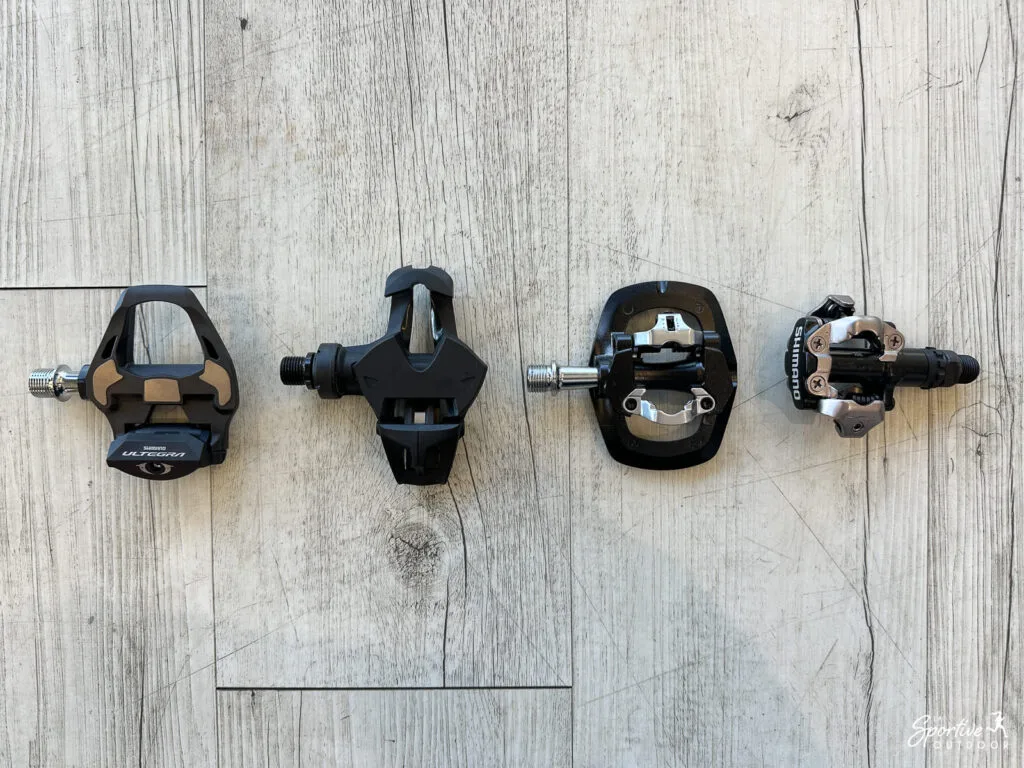
The different types of automatic pedals
There are several main types of automatic pedals, depending on the application:
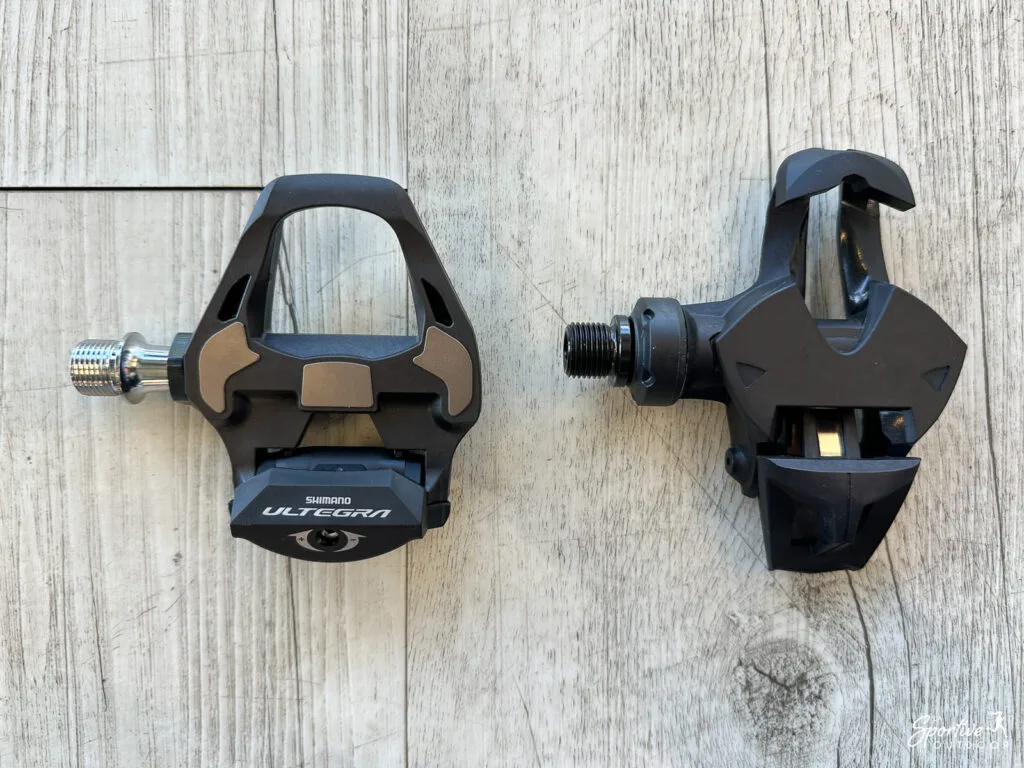
1. Road pedals
- Clip on one side only to reduce weight and improve aerodynamics.
- The wedges protrude from the shoe, making walking less comfortable.
- Most common systems: SPD-SL (Shimano), KEO BLADE (Look), XPRESSO (Time).
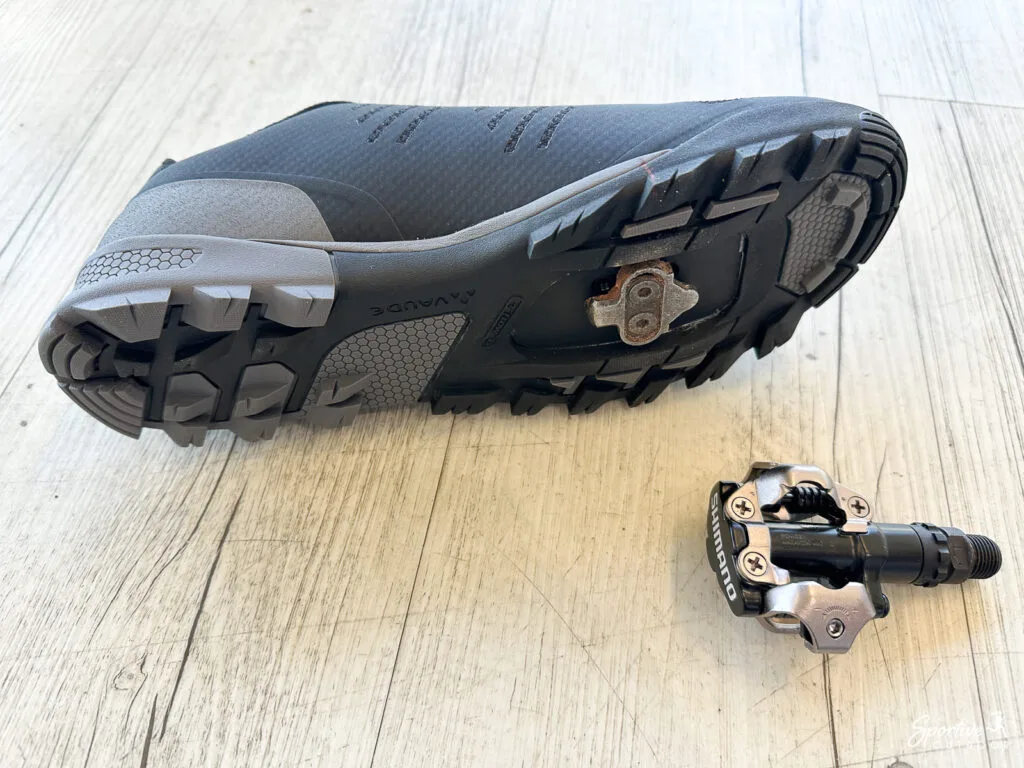
2. MTB and gravel pedals
- Clips on both sides for easy installation
- Wedges embedded in the sole for easy walking.
- Most common systems: SPD (Shimano), ATAC (Time), X-TRACK (Look).
3. Road & MTB mixed pedals
- MTB pedals BUT clip on one side only (like road pedals)
- Can be used with MTB or road shoes if compatible with MTB cleats
- Model: Shimano SPD ES 600
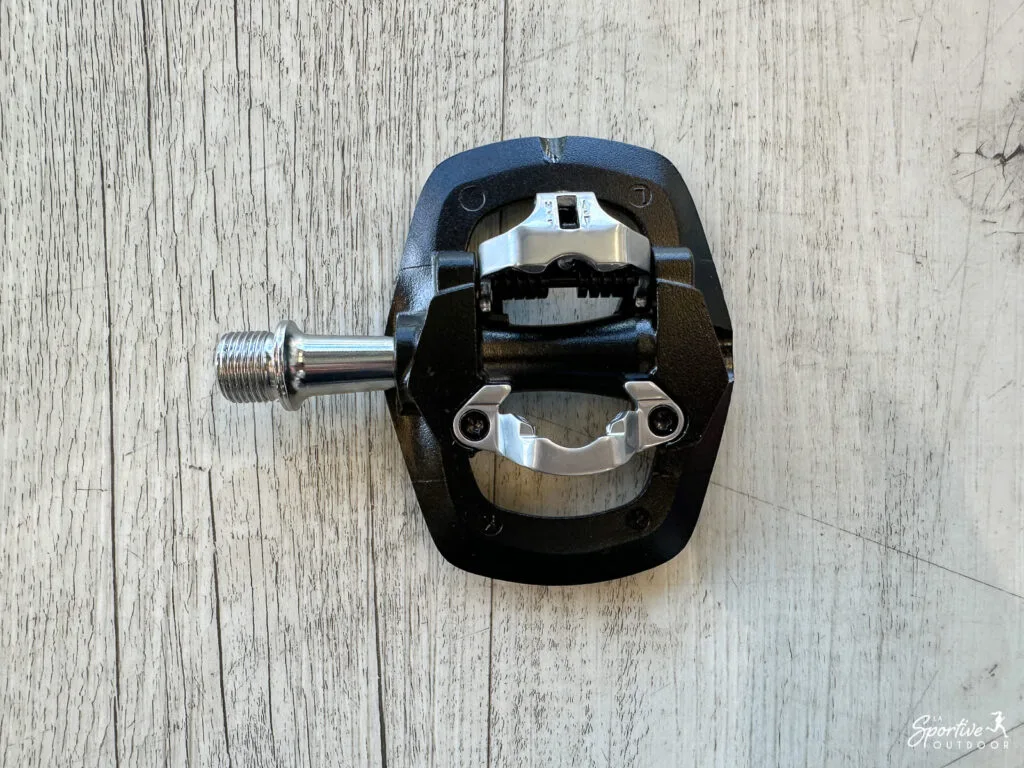
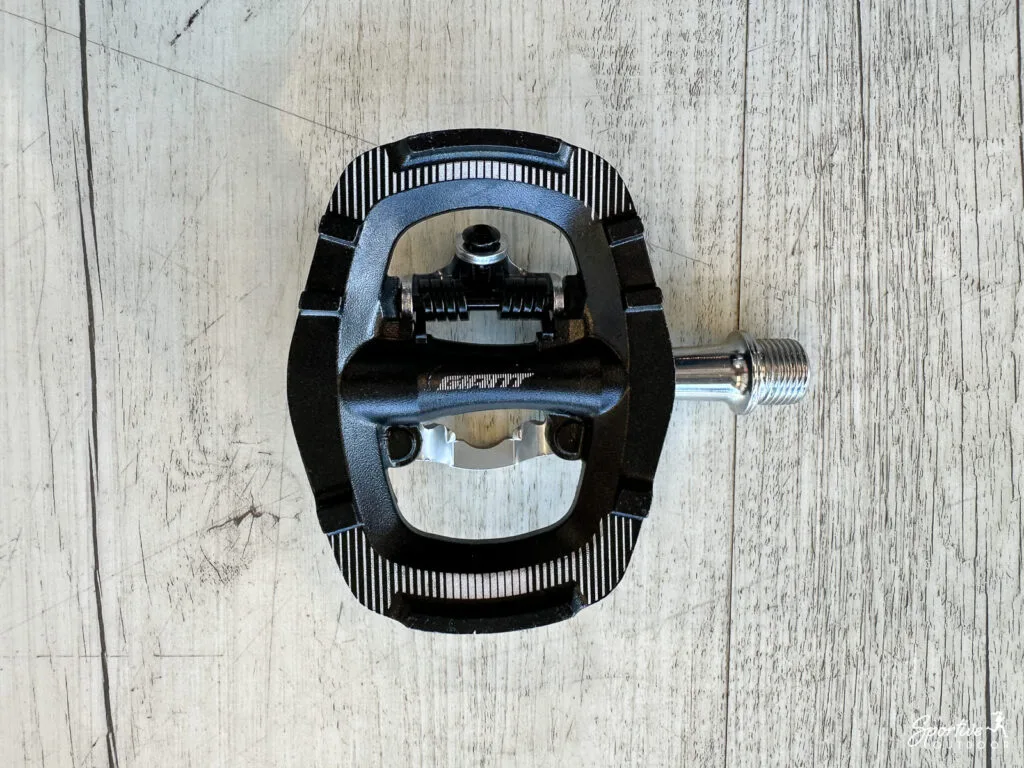
4. Flat & MTB mixed pedals
- One side automatic, one side flat.
- Ideal for versatile use and beginners.
- Disadvantages: greater weight and need to find the right side when placing the foot on it.
The different types of wedges
Please note that there are different types of automatic pedals, but also different types of cleats! These affect comfort and performance:
Comment soutenir La Sportive Outdoor?
L'une des façons de nous soutenir est de faire vos achats via nos sites partenaires.
L'idée n'est évidemment pas de vous pousser à la consommation: n'achetez que ce dont vous avez besoin mais, lorsque vous le faites, passer par nos liens nous aide car nous touchons ainsi une petite commission sans aucun coût supplémentaire pour vous.
Vous pouvez par exemple en ajouter certains en favoris pour vos prochains achats. Pensez à accepter les cookies de nos partenaires dès l’arrivée sur leur site.
- i-Run: jusqu'à -50% pour les Running Weeks
- Ekosport: -20% extra sur les nouveautés rando et bivouac
- Intersport: des offres sur la randonnée (notamment)
- Muule: 15% de promo avec le code VIP15
- Decathlon: pas mal de bons plans
- Lyophilisé&Co: lyophilisés, nutrition sportive et matos de bivouac
Pour plus de façons de nous soutenir, c'est ici.
- Wedges with large angular freedom: more freedom of movement, less pain. Good for the average person 😉
- Fixed wedges: maximize performance, but require proper adjustment. More for competitors!
Different brands offer different models, so pay close attention when buying!
How do I adjust my shims?
Correct adjustment is essential to avoid knee pain and ensure good power transfer. The middle of the wedges should be placed at the level of the metatarsals, as this is the part of the foot with which you apply pressure. Here’s how it works:
- Put on the shoe and stand up
- Mark the big and little toe joints on the shoe by drawing a pencil line on the shoe.
- Center the shim halfway between these marks (in height)
- Fit in line with the axis of the shoe to avoid foot deviations (except for special problems).
- Test and refine as necessary.
Which models to choose for your practice?
The choice is very personal and there’s no right answer, but here are Josephine’s favorite models:
- Road: Shimano 105 for good value.
- MTB/Gravel: Shimano M520 for its robustness.
- Rolling gravel: Shimano ES600, lightweight and versatile.
Tips for getting started
- Set spring tension to minimum for easy unclipping.
- Training at a standstill: on a wall or a home trainer to get into the habit.
- Anticipate stops: put your foot out before a stop sign or red light.
- Don’t let yourself go too quickly: the risk of falling increases as you become more confident! That’s when you usually take your first fall, not at the very beginning.
- Don’t get discouraged after a fall: it happens to absolutely everyone at the beginning with automatic pedals, just laugh it off and get back on your bike, it’s the job that comes in 😛
Good to know
Remember the reverse thread on the left pedal when fitting the pedals 😉
Conclusion
Switching to automatic pedals completely changes the pedaling experience. After a little getting used to, they provide greater comfort, power and stability. Don’t hesitate to try out different models to find the one that suits you best, and share your experiences with other cyclists!
This article contains affiliate links.