Changing an inner tube on a road bike tire – Complete tutorial + video
Changing an inner tube is the first thing you need to learn if you want to cycle independently. On a mountain-bike tire, it's pretty straightforward. On narrow road tires, there are a few tricks you need to know.
Watch the beginner video tutorial
The tools
The base
- The tube or tire to be replaced: dimensions are specified on the side of the tire or tube.
- Two tire levers: I recommend the all-plastic ones, as the metal ones can leave marks on rims, especially on black wheels.
- A pump: a foot pump for at home and a hand pump to keep with you (check that this pump can go up to the recommended pressure for your tires).
Extra tools
- An allen key or a multi-tool if you have a through shaft
- A pair of latex gloves to slip into your tool kit
- The Tyre Glider, a special tire changer that makes reassembly easier
Remove wheel
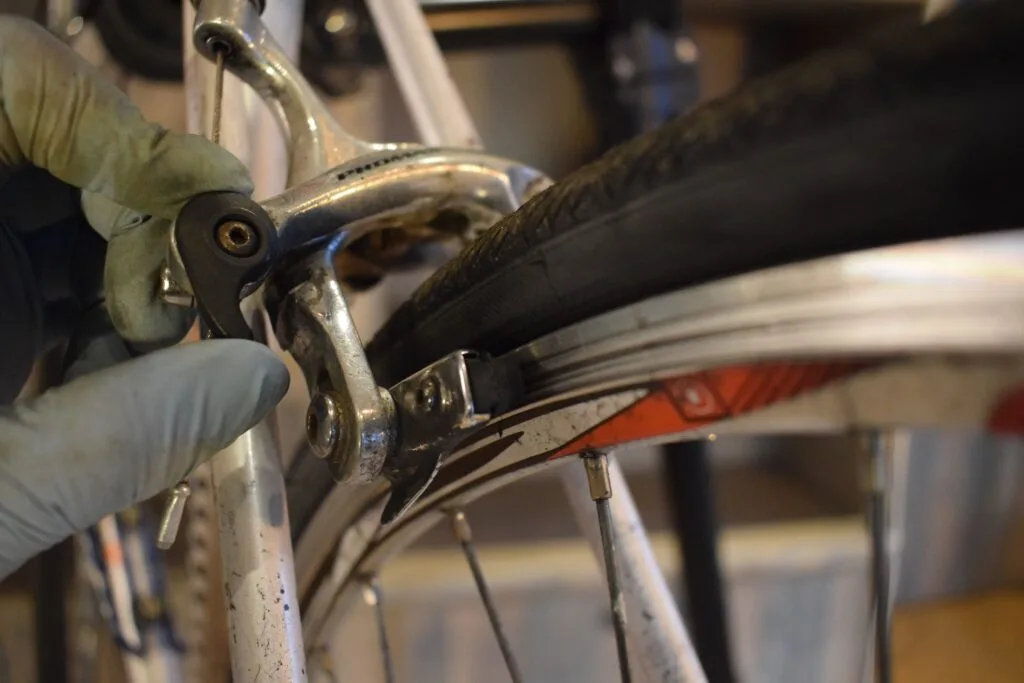
Shoe brakes (where the rim is the braking surface) can prevent an inflated tire from passing through. You can free up space with a small cleat on the brake caliper, or simply deflate the tire. This is not a problem with disc brakes.
To remove the rear wheel, it’s best to shift down to the smallest sprocket. Then pull the derailleur backwards to free the wheel without getting grease all over yourself.
Dismounting the tire
Dismount the tire using tire levers as shown in the video. If the tire is very stiff, use two tire levers side by side to free the first section of the rim.
Making a diagnosis
Inspection of the tire and rim is very important: it’s possible to have more than one puncture at the same time.
If you notice two small holes close together on the inner tube, it’s probably a pinch puncture: this indicates that the tube was under-inflated.
A worn tire will have a flattened tread, faded patterns, numerous small holes, or a cut in the sidewall. If your tire shows one or more of these symptoms, it’s time to change it.
Comment soutenir La Sportive Outdoor?
L'une des façons de nous soutenir est de faire vos achats via nos sites partenaires.
L'idée n'est évidemment pas de vous pousser à la consommation: n'achetez que ce dont vous avez besoin mais, lorsque vous le faites, passer par nos liens nous aide car nous touchons ainsi une petite commission sans aucun coût supplémentaire pour vous.
Vous pouvez par exemple en ajouter certains en favoris pour vos prochains achats. Pensez à accepter les cookies de nos partenaires dès l’arrivée sur leur site.
- i-Run: jusqu'à -50% pour les Running Weeks
- Ekosport: -20% extra sur les nouveautés rando et bivouac
- Intersport: des offres sur la randonnée (notamment)
- Muule: 15% de promo avec le code VIP15
- Decathlon: pas mal de bons plans
- Lyophilisé&Co: lyophilisés, nutrition sportive et matos de bivouac
Pour plus de façons de nous soutenir, c'est ici.
Remounting the tire
This is the most technical part for road tires. Making sure to respect the tire’s direction of rotation, remount it starting from the side of the valve. If the tire is tight, create space by pulling it towards the middle of the rim and towards the difficult part.
Use your neurons instead of destroying your fingers: forearms and palms are more powerful than fingers. Gravity is your friend. If what you’re doing isn’t working, turn the wheel around, change your technique rather than trying too hard.
Inspect assembly
A well-fitted tire should hug the rim in the same way all the way around the wheel. Be careful not to fix the valve ring too early, as this can create asymmetries. To be on the safe side, inflate the tire halfway, press it down as you rotate it, then check again.
If the tire is recalcitrant, cover the rim with soapy water and inflate to the maximum pressure marked on the tire sidewall.
Refit the wheel
For the rear wheel, pull the derailleur towards the rear of the bike and insert the wheel.
For through axles, no adjustment is possible; the wheel is always centered.
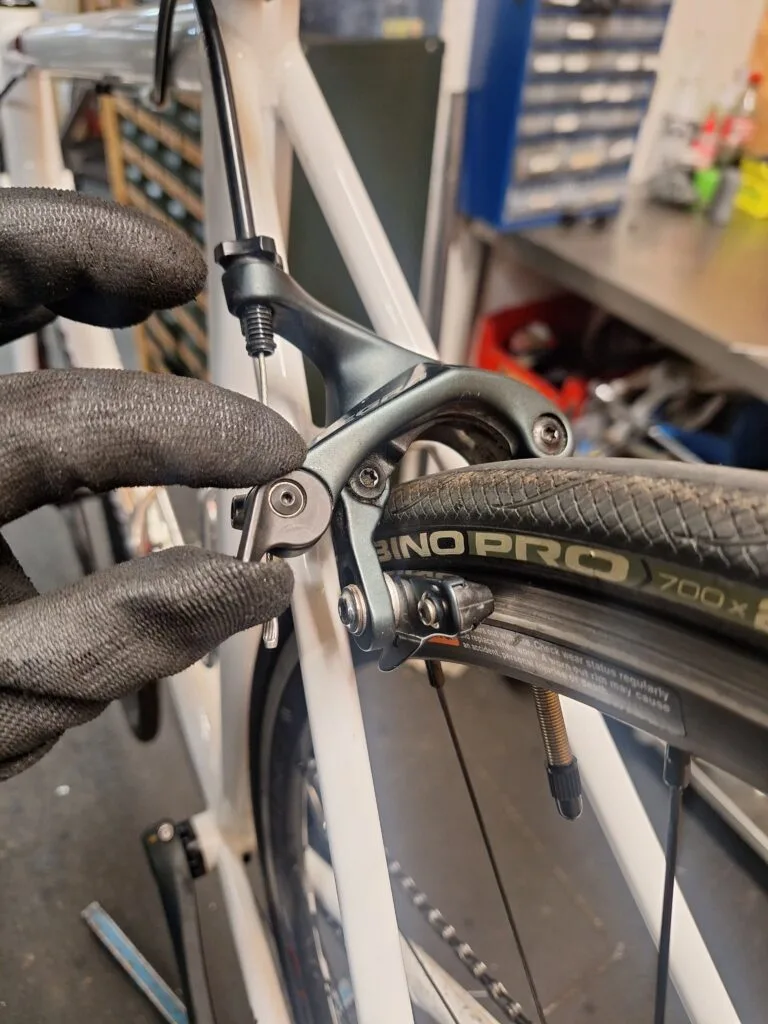
For wheels with quick-releases (which don’t require tools to undo), check the alignment of the braking surface (disc or rim) and the brake pads or shoes. There should be equal space on both sides.
This article contains affiliate links.