Bicycle repair kit – 4 lists of tools to take with you on your outings

To really benefit from the autonomy of a bicycle, it's best to be equipped to deal with a puncture: so a tool kit is essential. But what should you pack? In this article, I propose 4 lists of tools to carry, depending on your type of outing.
Complete bike tool kit video
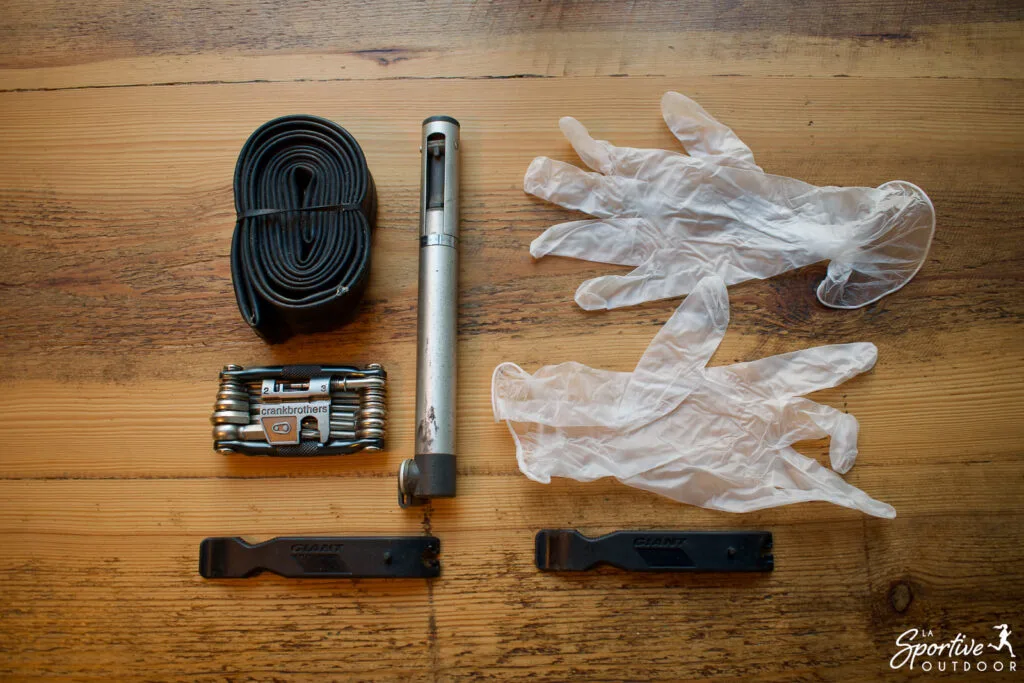
1. Small repair kit for Sunday outing
The first kit is the minimum needed to change an inner tube:
- Two tire levers
- An inner tube (check the dimensions indicated on the sidewall of your tire)
- A pump (make sure the pump can deliver sufficient pressure for road tires)
- A pair of latex gloves
- A multi-tool
Not all multi-tools are created equal
There are two things to consider: firstly, the number of tools; secondly, their quality : a tool made from good materials will be more robust. For example, a low-quality Allen wrench may round off with each use until it’s no longer usable, or even damage screw heads and make them difficult to turn. Investing in good tools will save you time and money in the long run.
I recommend a multi-tool which, as well as having Allen keys and screwdrivers, has a chain drive, spoke wrenches (if you know how to straighten a wheel or change a spoke yourself) and Torx wrenches if you need them.
On most modern bikes, the only tools needed for minor adjustments (cable tension, seat height…) are Allen keys and a screwdriver. On older bikes or entry-level city bikes, you may need 8mm to 15mm open-end wrenches. Inspect your bike and add these tools to your kit if necessary. Flat wrenches on multi-tools can help out, but often the shape of the multi-tool makes them inconvenient or impossible to use.
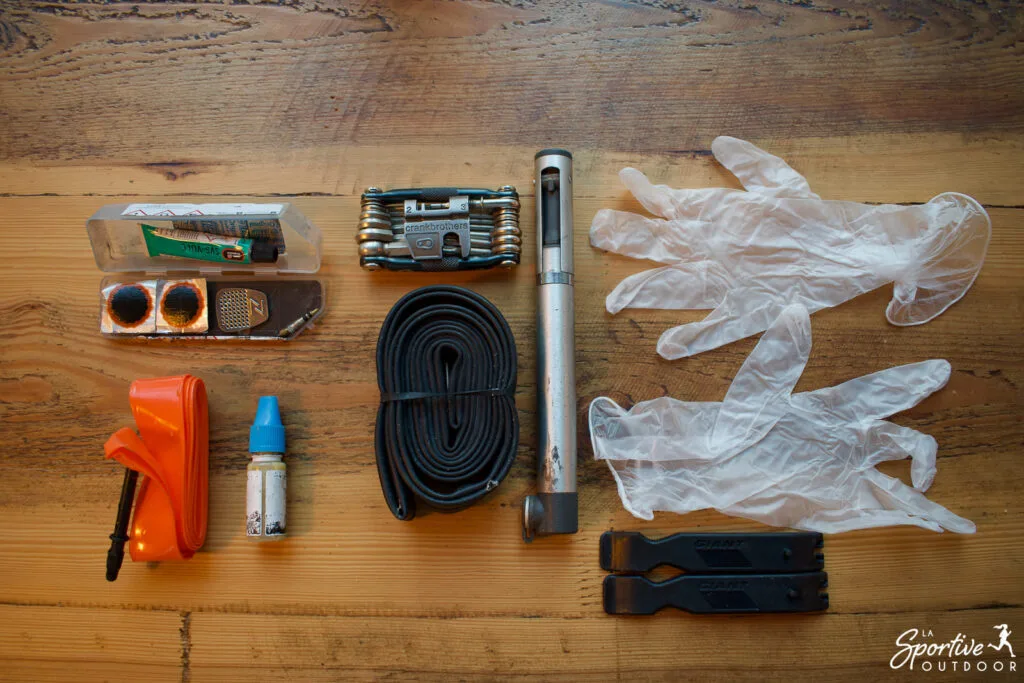
2. The lightweight bikepacking toolkit
The second toolkit is designed for vacation bikepacking, for a weekend or a week’s cycling trip:
- All the contents of the Sunday kit
- Small bottle of dry or wet oil or wax, depending on climate
- An extra inner tube (or to save space, a TPU inner tube)
- The patch kit with: patches (adapt their size to the size of your inner tubes), glue and a rasp or sandpaper. Traditional glue-on patches can last for years, so I recommend them rather than the self-adhesive type.
- A valve body (you can use one from an old inner tube) if your inner tubes have removable valve bodies.
3. The adventure toolkit
Here’s the most complete kit for big bike trips: it’s the kit you need for big adventures, when you’re living on your bike for a few months and want to be prepared for every eventuality.
- All the contents of the bikepacking kit
- A pair of brake pads or shoes
- Two rislans
- A few rubber bands (or inner-tube washers)
- An extra tire iron
- A MTB or road brake cable, depending on the bike
- Derailleur cable
- Insert for hydraulic brakes (ask your bike shop for one, they don’t know what to do with it)
- Derailleur hanger depending on bike
- An extra inner tube
- A section of strong tape
- A Fiber Fix kevlar spoke
- Appropriate spokes for your wheels (you can have up to four different sizes on one bike).
- A classic quick-release for the chain or a Wipperman Connex quick-release that can be put on and taken off by hand. Choose the right number of gears for your bike.

Have your bike serviced regularly!
The easiest way to limit the number of disappointments is to give your bike a complete overhaul before you leave on your trip. This greatly reduces the chances of having a mechanical problem and wasting an afternoon’s vacation in the Decathlon in an industrial zone 30km from your itinerary (yes, I’ve been there).
Cables don’t break without warning, and it’s a good idea to inspect them regularly. Washing your bike, for example, is often an opportunity to discover signs of wear. The only place where it’s hard to spot a fraying cable is inside the cocottes (the brake/gear levers on road or gravel bikes).
Two solutions: either learn how to lift the cover of the cocottes and inspect the cable, or change your cables regularly (every 3,000 km or so), preferring stainless steel cables to cheaper galvanized steel models.
4. Tubeless repair kit
Tubeless has its advantages, but the lightness of the tool kit is not one of them. For this reason, I only carry the minimum when tubeless, especially for a Sunday outing on the road. For mountain biking, the complete kit may be of more interest, but becomes a little cumbersome. I don’t recommend tubeless tires for great adventures: it’s better to have puncture-resistant tires. It’s in light bikepacking (medium kit) that I would carry tools specific to tubeless. Personally, I prefer to reach a destination where I can make a good repair, probably by removing the tire.
I recommend carrying traditional puncture equipment in case the tire tear is too large, and in addition:
Essential
- A tubeless repair kit (preferably including a blade to cut the bit that will protrude from the tire)
Optional
- CO2 cartridge and inflator
- Large tubeless patches or classic patches
- A small bottle of preventive (like oil, carry a tiny bottle to refill)

Personalize your kit
Create your own list according to the specific features of your bike. This is particularly important if you have a bike with less common standards: a vintage bike, drum brakes, hub-integrated gears, dynamo system, Campagnolo transmission…
Finally, only carry what you know how to use, otherwise you’ll be carrying weight for nothing. The exception to this rule is to carry the right size spokes for your wheels on long trips. When I mop, my spokes are usually attached to the underside of the flat part of my luggage rack. Practice before you embark on a big adventure. At the very least, know how to change brake pads (safety first) and diagnose signs of wear. Have a good ride!
