Travelling by plane with your bike: the complete guide to stress-free travel

As a Canadian, it's hard not to envy European cyclists who ride almost year-round. It's only a short step from there to wanting to take off with your own bike to experience this freedom. A step which, let's face it, is daunting: how do you transport your bike by plane without breaking it? Which transport box should you choose to avoid exorbitant airline fees?
Summary
It’s precisely to simplify these logistics that this guide exists. Because yes, traveling by plane with your bike may seem complicated. But with a few tricks and a little preparation, you’ll quickly realize that it’s not rocket science… and that you can even get the hang of it. There’s a whole world between the desire to ride somewhere else and the logistical reality… a world we’re taming one screw at a time. From choosing a suitcase to reassembly at your destination, here’s how to transform your bike into a piece of luggage ready to take off.
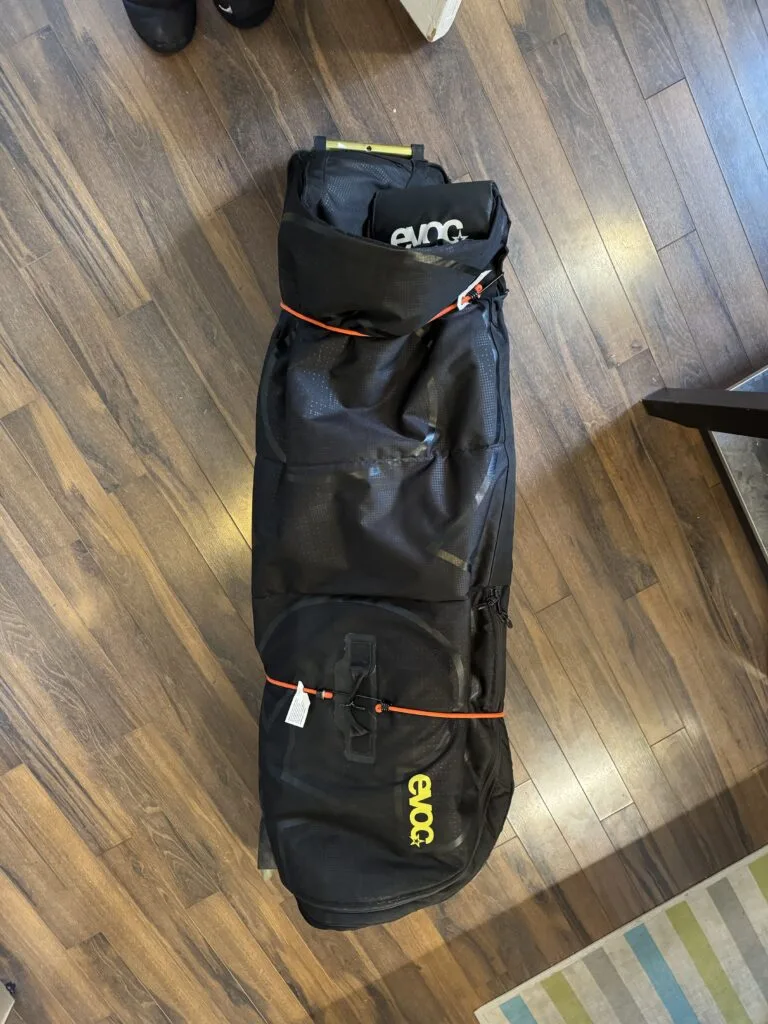
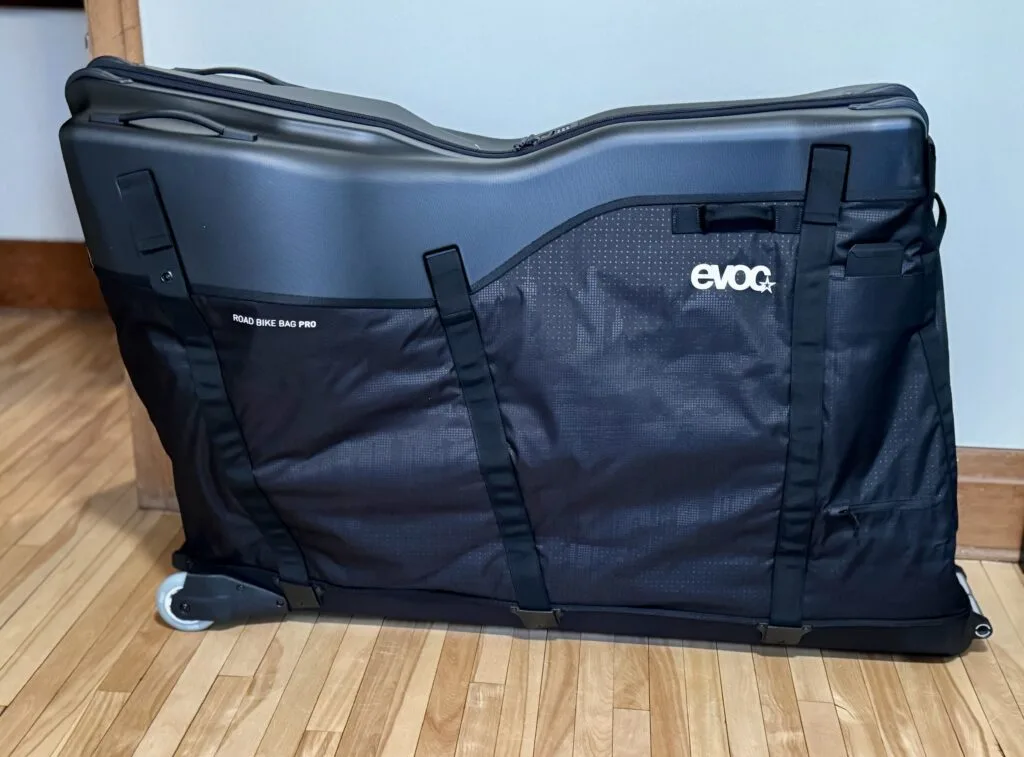
Choosing the right transport box for your bike
Bicycle rental or purchase: which is better?
It’s not essential to invest in a box, especially if you don’t plan to fly regularly with your bike. Ask your local bike shop, as many offer box rental.
6 technical criteria for selecting your bike case
If you want to buy one, you need to ask yourself a few questions beforehand:
- What type(s) of bike will it be used for: road, gravel, mountain (especially to validate tire width and frame size)?
- Are your bike’s handlebars integrated or can they be easily removed?
- Would you like additional storage capacity?
- Would you like to be able to compress the box for storage?
- Are you more comfortable with a fully rigid, semi-rigid or flexible box?
- Will you have to walk long distances with the box: are castors necessary?
Once you’ve clarified these aspects, you’re ready to choose, and the multitude of possible options will be greatly reduced. Finally, note that weight can vary greatly from one model to another.
Airlines: mastering fares and regulations
Weight, dimensions and shipping costs: what you need to check
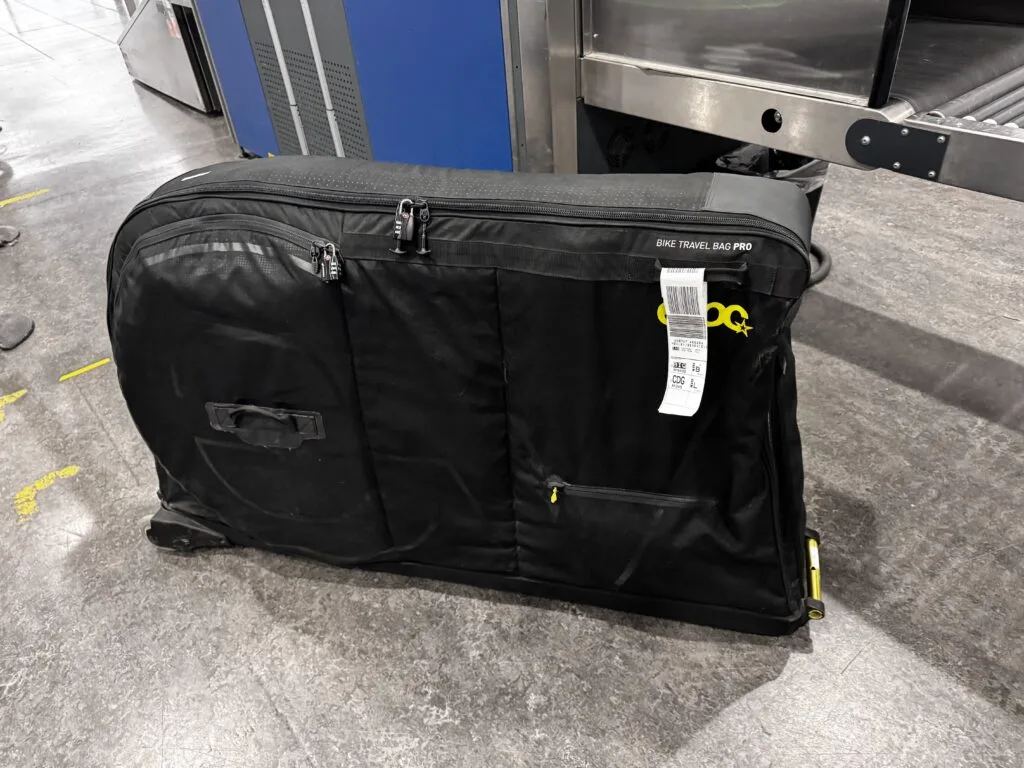
I won’t go into an exhaustive list of airlines and all the criteria that apply to them, but I would advise you to consider the policy surrounding the carriage of bicycles as baggage before booking your plane tickets. While some airlines charge exorbitant fees, which sometimes vary for each additional kilogram, others are more lenient on the wallet. Some airlines even count bicycles as checked baggage.
Policies on the dimensions and weights accepted and permitted also vary greatly from one airline to another: find out before you arrive at the airport to avoid unpleasant surprises.
Comment soutenir La Sportive Outdoor?
L'une des façons de nous soutenir est de faire vos achats via nos sites partenaires.
L'idée n'est évidemment pas de vous pousser à la consommation: n'achetez que ce dont vous avez besoin mais, lorsque vous le faites, passer par nos liens nous aide car nous touchons ainsi une petite commission sans aucun coût supplémentaire pour vous.
Vous pouvez par exemple en ajouter certains en favoris pour vos prochains achats. Pensez à accepter les cookies de nos partenaires dès l’arrivée sur leur site.
- i-Run: jusqu'à -50% pour les Running Weeks
- Ekosport: -20% extra sur les nouveautés rando et bivouac
- Intersport: des offres sur la randonnée (notamment)
- Muule: 15% de promo avec le code VIP15
- Decathlon: pas mal de bons plans
- Lyophilisé&Co: lyophilisés, nutrition sportive et matos de bivouac
Pour plus de façons de nous soutenir, c'est ici.
Pro tips for securing your bike registration
If possible, book your bike space several days before you leave, to ensure that your bike will travel with you.
Finally, pay particular attention to what is allowed to be included, in addition to the bicycle, inside your transport box. Some companies are very strict and only allow you to include what’s bike-related, but this line is blurred: sometimes bike clothing is tolerated, other times not. Bring out your best smile, it helps sometimes! 🙂

Preparing for dismantling: tools and workspace
Although taking your bike to pieces may seem like an intimidating step when you’re flying with your bike, rest assured that it’smuch easier than you think.
Ideally, (especially for the first time) you should have a few hours free in front of you, so that you can get things done without stress, as well as a room with an uncluttered workspace.
I’m used todoing everything on the floor and squatting on it when necessary. Pay particular attention to the photos and notes you’ll be taking to help you reassemble the beast once it’s safely in port. This is where it all comes together: the living room is transformed into a workshop, and the bike into a puzzle that you can learn to dismantle without fear.
Tools required :
- Torque wrench (lighter, smaller travel-size options are available);
- Pedal wrench;
- Measuring tape;
- Telephone (for taking photos and notes, I can’t stress this enough).
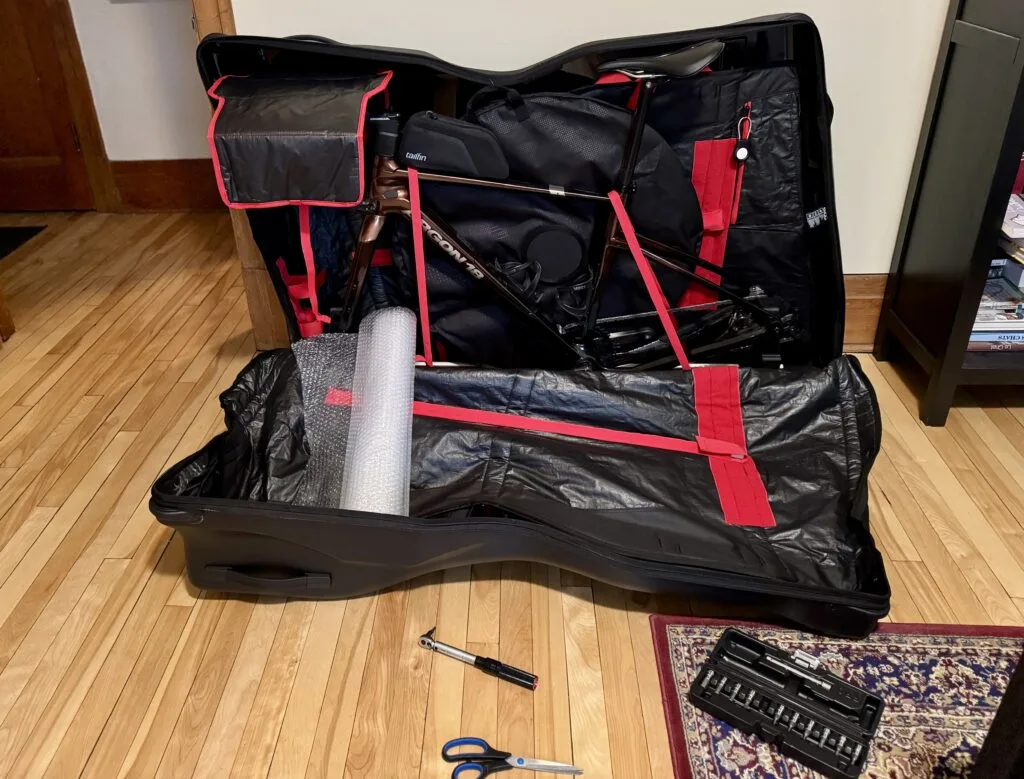
Technical guide: dismantling and protecting your bike step by step
Now, attack!
1. Pedals: the basis of canning
I remove the pedals first, since all airlines (as far as I know) require you to remove them, and the tires will support you. Here’s a tip for this seemingly simple step, which can quickly turn into a nightmare if you don’t get it right.
There are several ways to remove pedals, but here’s the one that often saved me when my pedals got stuck (Quebec accent bonus 😀). Finally, a crucial step before putting them back on, don’t forget to grease the threads on them to prevent them from getting stuck when you want to remove them again!
Pro tip
I grease the threads before storing the pedals in the box, in a ziplock bag, to avoid having to drag around a tube of grease.
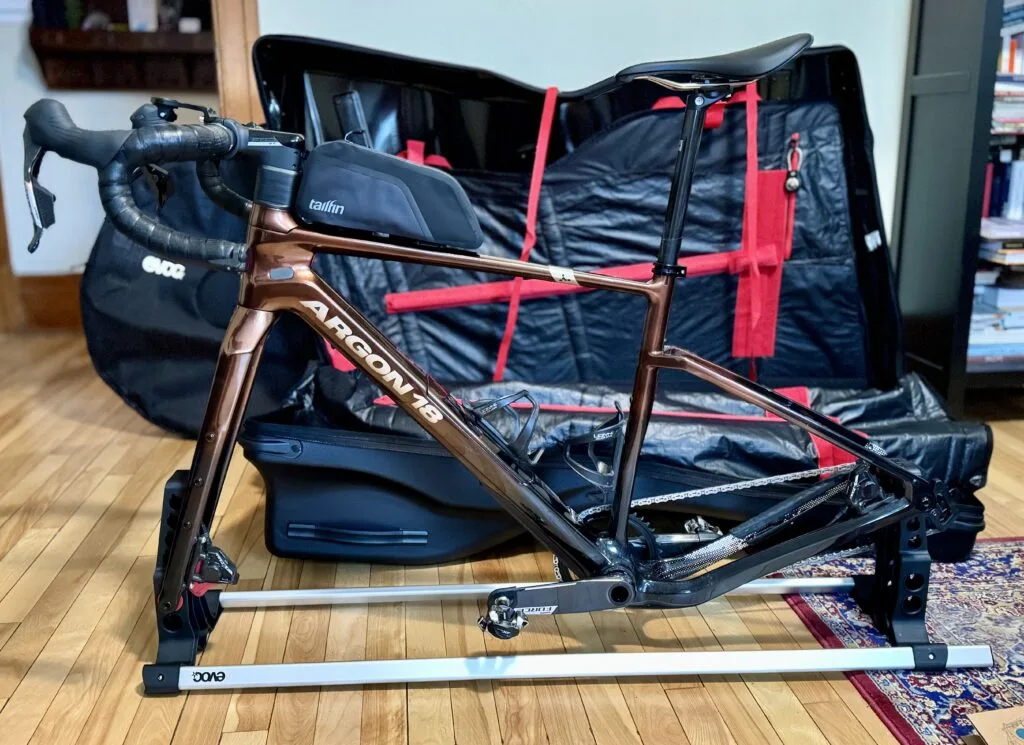
2. Wheels: free the frame
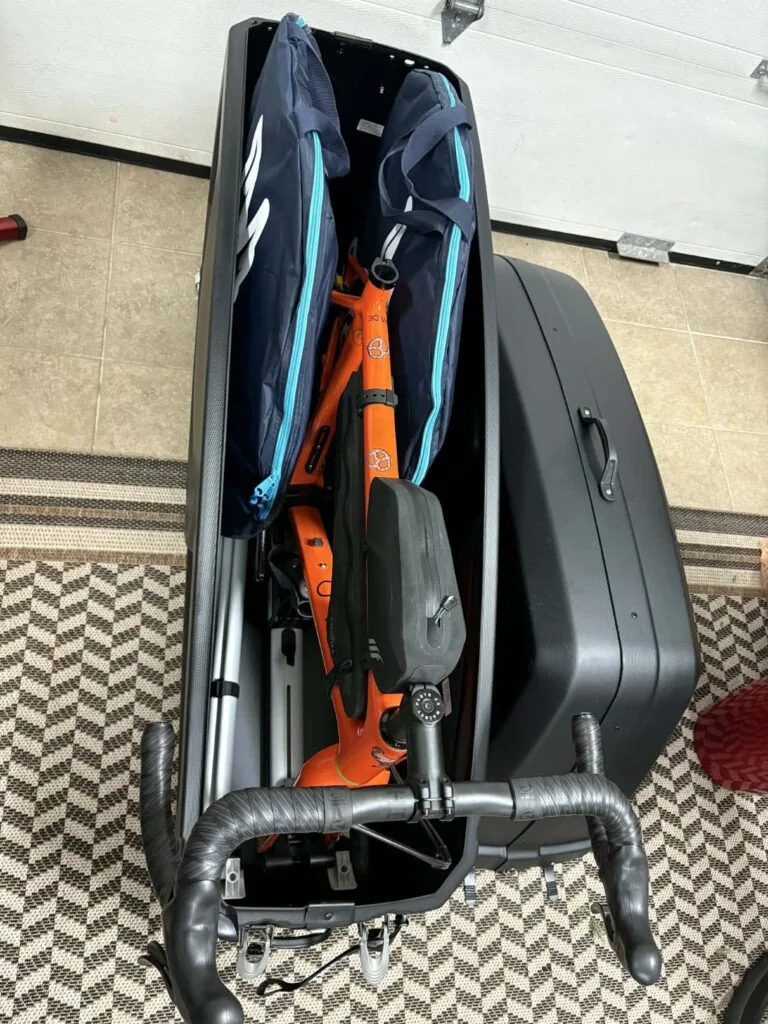
Then I remove the wheels and attach the bike frame to the box’s anchors. My version (Evoc XL pro travel bag) offers a practical removable support that allows me to work outside the box right up to the very end. Don’t forget, if your bike is fitted with disc brakes, to insert brake pad shims to avoid contact between them. If you don’t have any, a piece of cardboard inserted firmly will do the job just fine.
Airlines require you to reduce the pressure in your tires before you take off (to prevent them from bursting, it seems), so remember to do so, but not too much that your tires go crazy – especially if you ride tubeless, it would be very unpleasant to have your precious ones covered in sealant when you arrive.
Then, depending on the model of bike box, it will depend on how much you need to dismantle your precious bike.
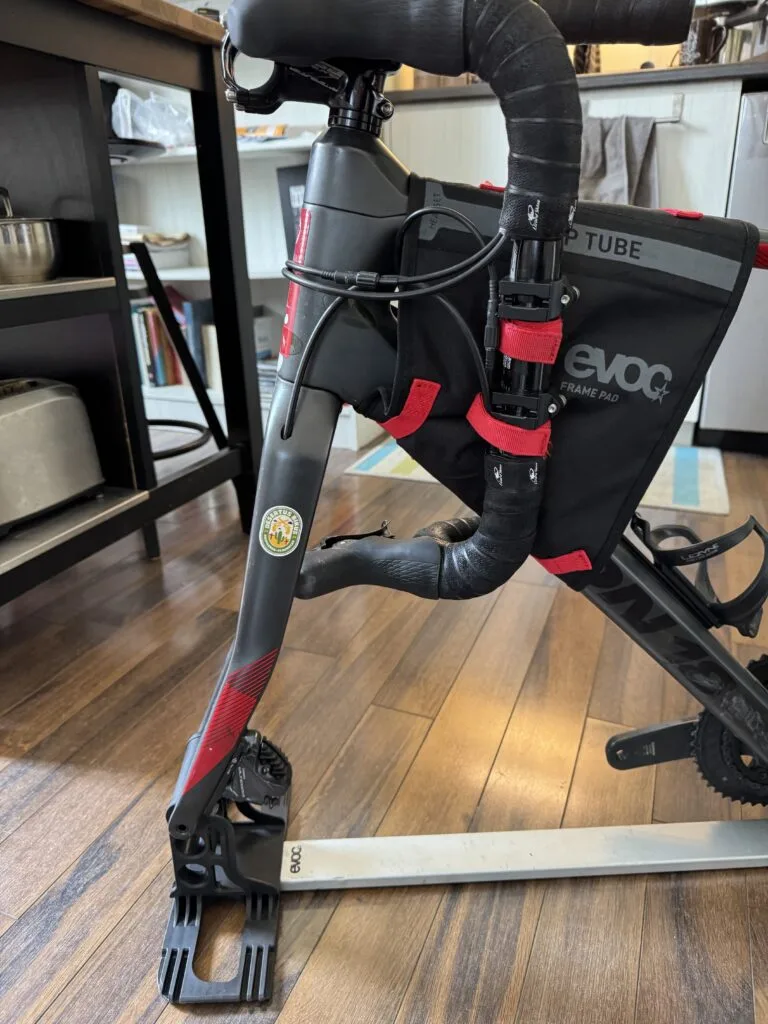
3. Handlebars: depending on your configuration
As far as I’m concerned, the configuration of my box doesn’t require me to remove the handlebars or attach them to the side (see old version photo), but the more compact transport models do. Owners of integrated handlebars, increasingly present on the market, must now use boxes in which the handlebars remain as they are.
If you need to remove the handlebars, unscrew the handlebars from the stem and fix them in place (be careful not to bend or overstretch the cables and sheaths). Take photos before you do this, or leave marks with tape if possible.
4. Derailleur and chain: protect or dismantle?
Personally, I’ve never dismantled my rear derailleur, as I felt that the protection of my box and the one I added to it were sufficient, but I know that many people do it, and it’s really simple. So if you have any doubts, remove it and wrap it in bubble wrap, with the slackened chain next to it.
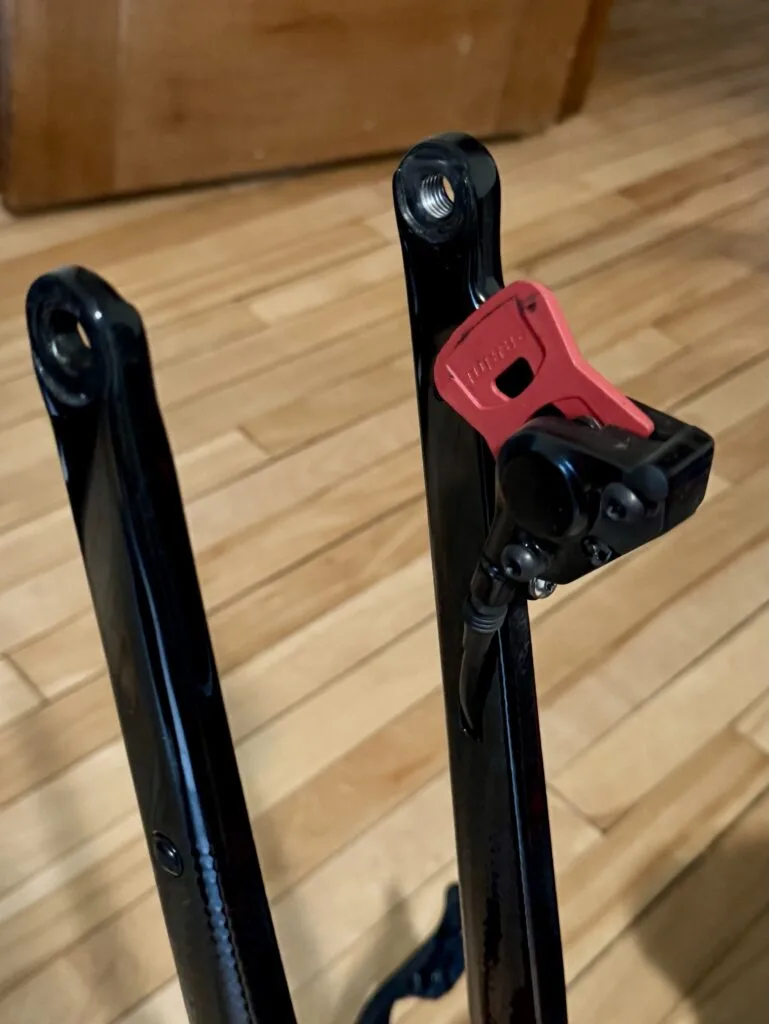
If your bike is equipped with an electronic groupset, remember to remove the battery whenever possible. With SRAM (AXS), the battery can be removed in a matter of seconds, and the small protector fitted.
With Shimano (Di2), the battery is usually integrated into the frame or seatpost, making it more difficult to remove: make sure the system is switched off (sleep/airplane mode) and check with your airline that transport is authorized – which is usually the case.
And don’ t forget to take along the charger or cable you’ll need to recharge your batteries at your destination.
5. Brake discs: learning the hard way
I’ve never taken them off, but there have been two occasions when the discs were warped (bent slightly) to the point where the wheel wouldn’t turn. Luggage, whether it contains bikes or not, sometimes gets roughed up and takes several knocks – this is probably what happened and my discs took the impact as they were on the sides of the bike box, in the wheel compartments. I now carry around a disc changer, but check with your bike shop for extra protection or to find out how to remove them.
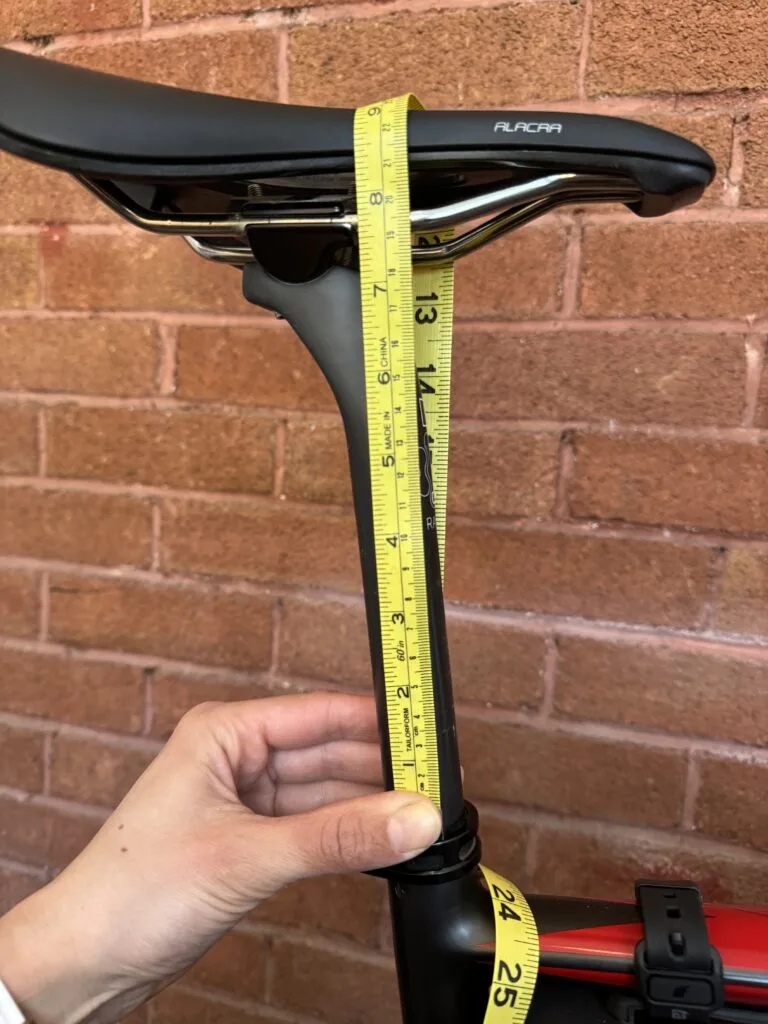
6. The saddle: a question of space and measurements
This point is rather personal and dictated by the size of your box. Check the maximum insertion depth allowed by your bike’s frame (Di2 drivetrains often have a battery or wiring inside the seatpost). Use a tape measure, take photos of the height markers or mark the height with tape.
7. Little extras
What happens to frame and saddle bags, cans, aerosol bars, etc.? For my part, I remove the aerosol bars, but I leave the other items attached as they are, if they’re not in the way and there’s no risk of them coming loose.
Extra protection: prevention is better than cure!
Don’t hesitate to add extra protection to your frame, or in places where you feel less protected. Tubes of foam plumbing pipe insulation and bubble wrap are ideal for this purpose.
Pro tip
Don’t forget to ensure that everything is securely fastened in the box, and that nothing will move around and damage your frame or components in transit.
Safety and logistics: a box ready for adventure
Celebrate! The car is now in the box, and the journey can begin!
Total weight and pre-departure checks
Remember to weigh everything. The ideal weight is between 23 and 32 kg. Good to know: many airlines (especially for domestic flights) count bicycles as checked baggage, as long as they don’t exceed 23kg.
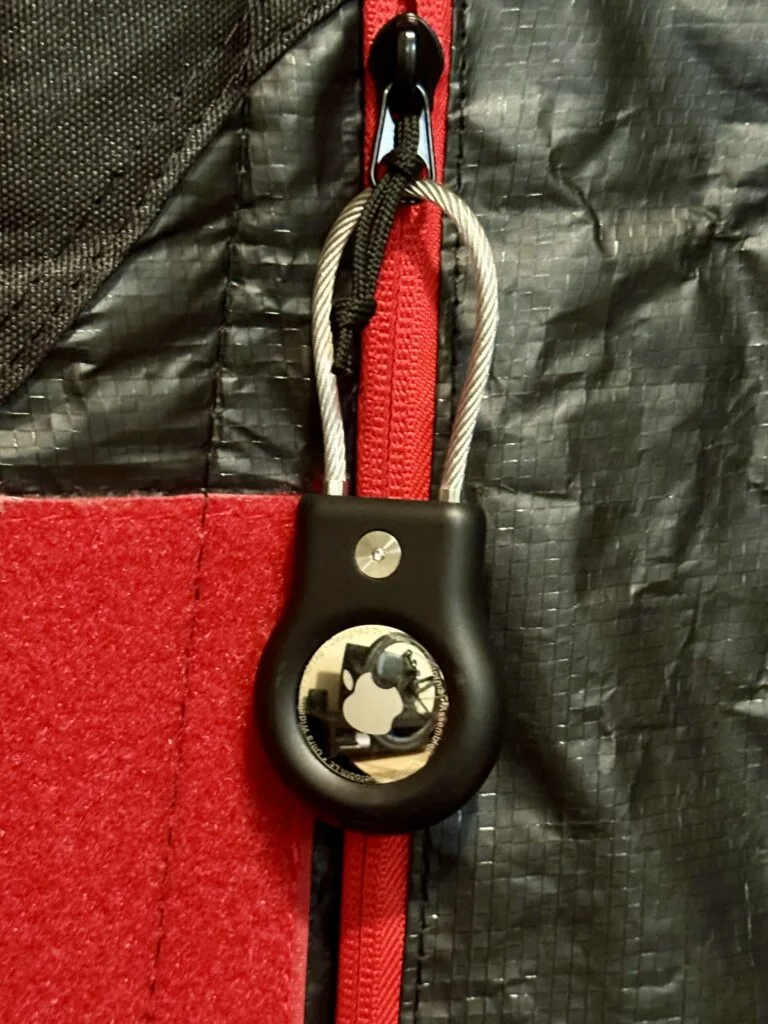
Traceability and identification: AirTag, padlocks and photo evidence
- Identification: Don’t forget to identify your bike box with your contact details!
- Padlock: Lock your box.
- Photo evidence: Take photos (have I said it enough?) in case of… we don’t wish each other ill, but it’s better to be prepared to defend a potential dispute.
- Insurance: Check your home insurance cover in the event of damage
- Location: Remember to add an AirTag to your box.
Reassembly: don’t panic!
Once you arrive at your destination, reassembly follows the reverse logic, but a few tricks can save you from trouble:
- Take your time: You’re on vacation, after all!
- Your photos are your friends: consult them religiously.
- Test everything: brakes, gears, bolt tightening before your first ride.
- Small adjustments: readjusting a derailleur or recalibrating brakes is normal after a trip.
And if you’re really not comfortable? Locate the nearest bike shop and have it checked before you set off! The important thing is to ride, no matter how you get there!
Practical tips in bulk
- Be prepared to open your box at the airport for a security check.
- To reduce the stress of landing without my bike, I prioritize direct flights whenever possible.
- Bear in mind that travelling with such a large piece of luggage makes getting around a little more complicated. Check luggage policies on trains and buses, avoid stairs, allow extra time for walking and choose the right size of cab.
FAQ
Do I have to deflate my tires before the flight?
Yes and no. Airlines often require this, to avoid an explosion due to the pressurization of the cargo hold. However, don’t empty them completely: keep a minimum of pressure to keep the tire firmly in place on the rim, especially if you’re riding tubeless. This will prevent the sealing fluid from leaking all over your box!
What is the average cost of transporting a bicycle by plane?
Fares vary enormously from company to company. Some include the bike in your checked baggage allowance (often under 23 kg), while others charge a flat fee ranging from $50 to $200 per trip. Always check your carrier’s specific policy before purchasing your ticket.
Rigid suitcase or soft carrying case: which to choose?
The rigid box offers maximum protection against shocks, but is heavier and more difficult to store at destination. The flexible (or semi-rigid) case is lighter and easier to handle, but requires more internal protection (foam, bubble wrap). Your choice will depend on your budget and your ease of handling bulky luggage.
Can I put my tools and clothes in my bike box?
It’s a gray area. While some companies allow it, others are very strict and only accept bicycles.
How can I be sure that my bike has reached its destination?
The ultimate trick is to slip an AirTag (or GPS tracker) into the frame or toolkit inside the box. This allows you to locate your bike in real time via your phone, and to know whether it has boarded the connection at the same time as you.
What if I’m not comfortable with mechanics?
Don’t panic! If disassembly seems insurmountable, ask your bike shop to prepare the bike for you. For reassembly on arrival, find a local bike store near your hotel and make an appointment for a safety check before your first ride.
That’s it! With a little preparation and patience, you’ll discover that traveling with your bike opens up a world of possibilities. And who knows, maybe, like me, you’ll develop a taste for the pre-trip routine that’s such an integral part of the adventure?