[TUTO] Repairing a tubeless tire with a wick
Punctures: a cyclist's nightmare... With a tubeless installation, you can limit roadside repairs. A good preventive will seal small leaks on its own, and for larger ones, you can use a wick. Here's how to repair your tubeless tire.
Watch the video tutorial
Tubeless: how does it work?
Unlike a conventional tubeless tire, a tubeless tire is mounted directly on the rim, with a preventive fluid inside. This fluid seals small punctures. If the hole is too big, a drill bit can be inserted to plug the leak.
- Advantages : fewer punctures, low-pressure operation with no risk of pinching, for greater comfort.
- Disadvantages : specific and sometimes messy maintenance. No magic wand to protect you from tire tears or very large holes.
Regular tubeless tire maintenance
Check your preventive fluid regularly! It dries out over time and will no longer be effective in the event of a puncture. Take the wheel off the bike and shake it: if you don’t hear any fluid, it’s time to add more.
Avoid leaving your tubeless bike near a radiator, which accelerates the drying out of the preventive.
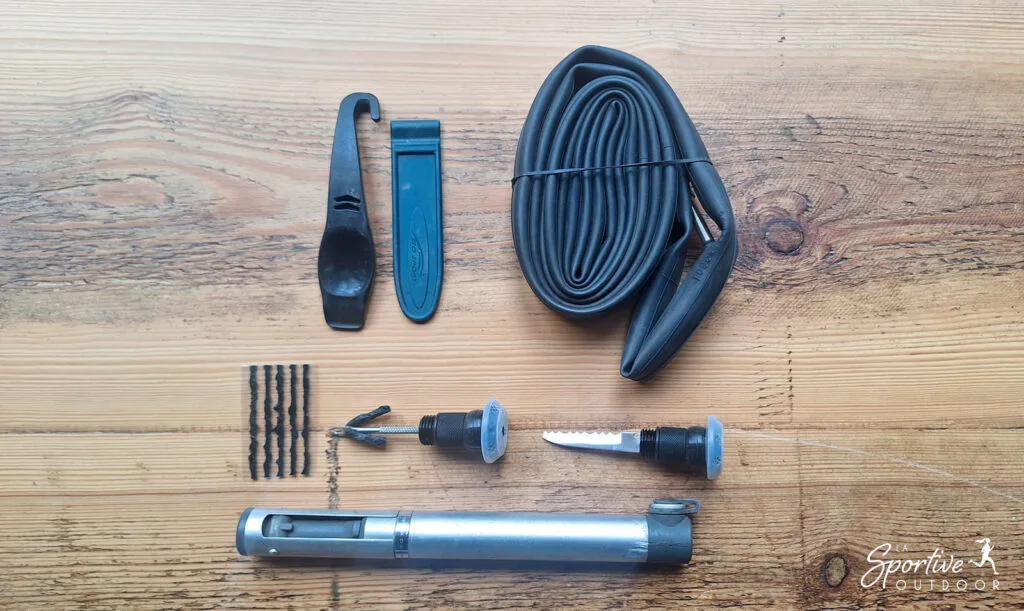
Tools to carry with you
To repair a puncture on a tubeless tire that won’t fix itself, you need :
Comment soutenir La Sportive Outdoor?
L'une des façons de nous soutenir est de faire vos achats via nos sites partenaires.
L'idée n'est évidemment pas de vous pousser à la consommation: n'achetez que ce dont vous avez besoin mais, lorsque vous le faites, passer par nos liens nous aide car nous touchons ainsi une petite commission sans aucun coût supplémentaire pour vous.
Vous pouvez par exemple en ajouter certains en favoris pour vos prochains achats. Pensez à accepter les cookies de nos partenaires dès l’arrivée sur leur site.
- i-Run: jusqu'à -50% pour les Running Weeks
- Ekosport: -20% extra sur les nouveautés rando et bivouac
- Intersport: des offres sur la randonnée (notamment)
- Muule: 15% de promo avec le code VIP15
- Decathlon: pas mal de bons plans
- Lyophilisé&Co: lyophilisés, nutrition sportive et matos de bivouac
Pour plus de façons de nous soutenir, c'est ici.
- A bit kit: bits, an insertion tool, and possibly a blade, especially useful for road tires.
- ACO₂ pump or inflator for re-inflation (if the tire was difficult to put on during installation, opt for CO2).
- Gloves (optional, but practical, as the preventive is quite sticky)
- An inner tube and tire levers as a last resort
- A small bottle of preventive if you’re bikepacking
How to repair a tire with a wick
The first thing to remember
Hear a loss of air as you drive? Drive a few more meters, and if the hole doesn’t close up, stop.
Lift the wheel, cover the hole with a finger to stop air leakage, then position the hole at the bottom of the wheel: gravity will deposit the preventive there.

How to use a wick
If that’s not enough, it’s time to use a wick. The most important thing is to limit air loss so that the tire stays firmly in place and you avoid the need for CO₂.
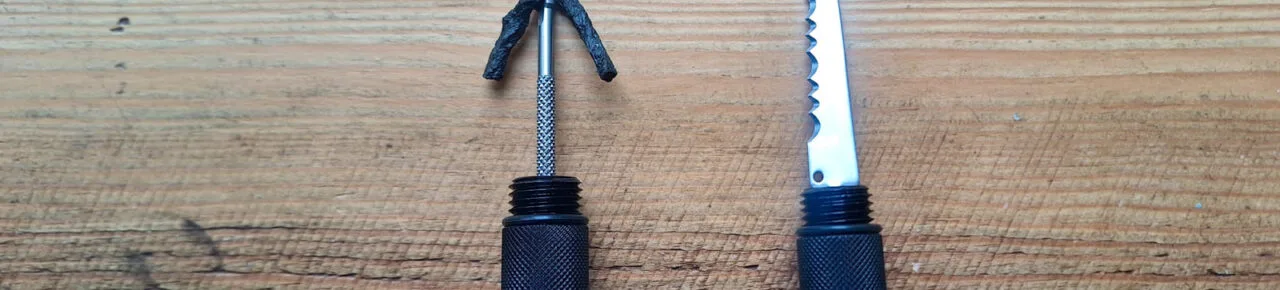
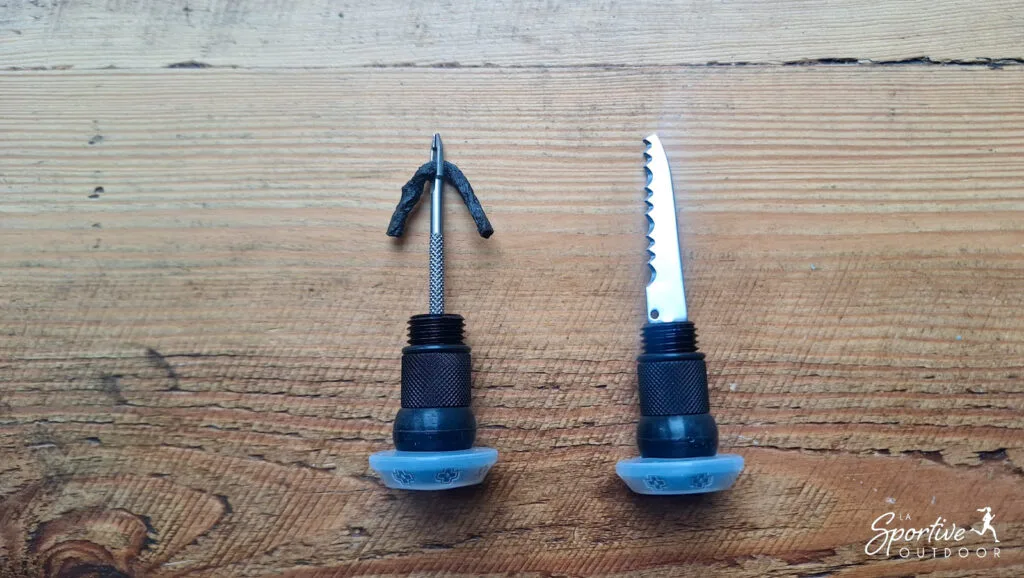
- Prepare the drill bit: Take a suitably sized drill bit (the larger the hole, the thicker the bit) and thread it into the insertion tool.
- Insert the drill bit at 45° : Insert the bit firmly into the hole, turning slightly, then gently withdraw the tool, leaving a small part of the bit protruding. Be careful not to perforate the rim base with the tip of the tool (more likely on road tires).
- Leave to work: The wick will stick to the tire thanks to the preventive and plug the hole. You can trim off any excess if necessary.
- Add preventive (if you have any on you)
- Re-inflate: check pressure and re-inflate with a pump or CO₂ cartridge.
If this doesn’t work, if the bit doesn’t hold or the hole is really too big, put on an inner tube and repair or change the tire on the way home.
Back home
After a roadside repair, a few checks are in order:
- Check for leaks: Turn the wheel, check for leaks and check for loss of pressure.
- Add preventive: Put some back on if you couldn’t do it on the side of the road. If you can peel back the sidewall of the tire and pour in the preventive, you’ll avoid having to deal with clogged valves. A high-flow valve can limit the risk of clogging.
Keep an eye on the wick: if it comes loose, or if the tire loses its shape or pressure, remove the tire, clean it and stick a tubeless patch inside. As a last resort, change the tire.
Ready to go again!
Tubeless is magic 90% of the time, and the remaining 10% requires a little elbow grease and know-how. By mastering this repair, you’ll save time and avoid walking home.